30% of daily‑tested ESD wrist straps fail. Real field data: broken cords, conductive band wear, and false passes. How to find and fix failures in 30 seconds.
1. Real data: 100 wrist straps tested on a live production line
We ran a surprise test at a PCBA factory last year: randomly selected 100 operators working on the line, measured their wrist strap system resistance with an ANSI‑compliant tester (pass range 0.8–1.2 MΩ).
| Test result | Number of straps | Percentage |
|---|---|---|
| PASS (0.8–1.2 MΩ) | 68 | 68% |
| HIGH (>1.2 MΩ) | 26 | 26% |
| LOW (<0.8 MΩ) | 6 | 6% |
Nearly one third failed. 26% were open (HIGH) – effectively not grounded.
When we traced the root cause of the failures, the breakdown was:
| Failure mode | % of failed straps |
|---|---|
| Broken cord (open circuit at snap or clip) | 52% |
| Wrist band conductive yarn broken or too dirty | 28% |
| Corroded or loose snap button | 12% |
| Alligator clip attached to painted rack or table leg | 8% |
More than half of the failures came from the ground cord – the coiled wire that looks fine on the outside but has a broken copper core inside.
2. Why does a wrist strap “look good but test bad”?
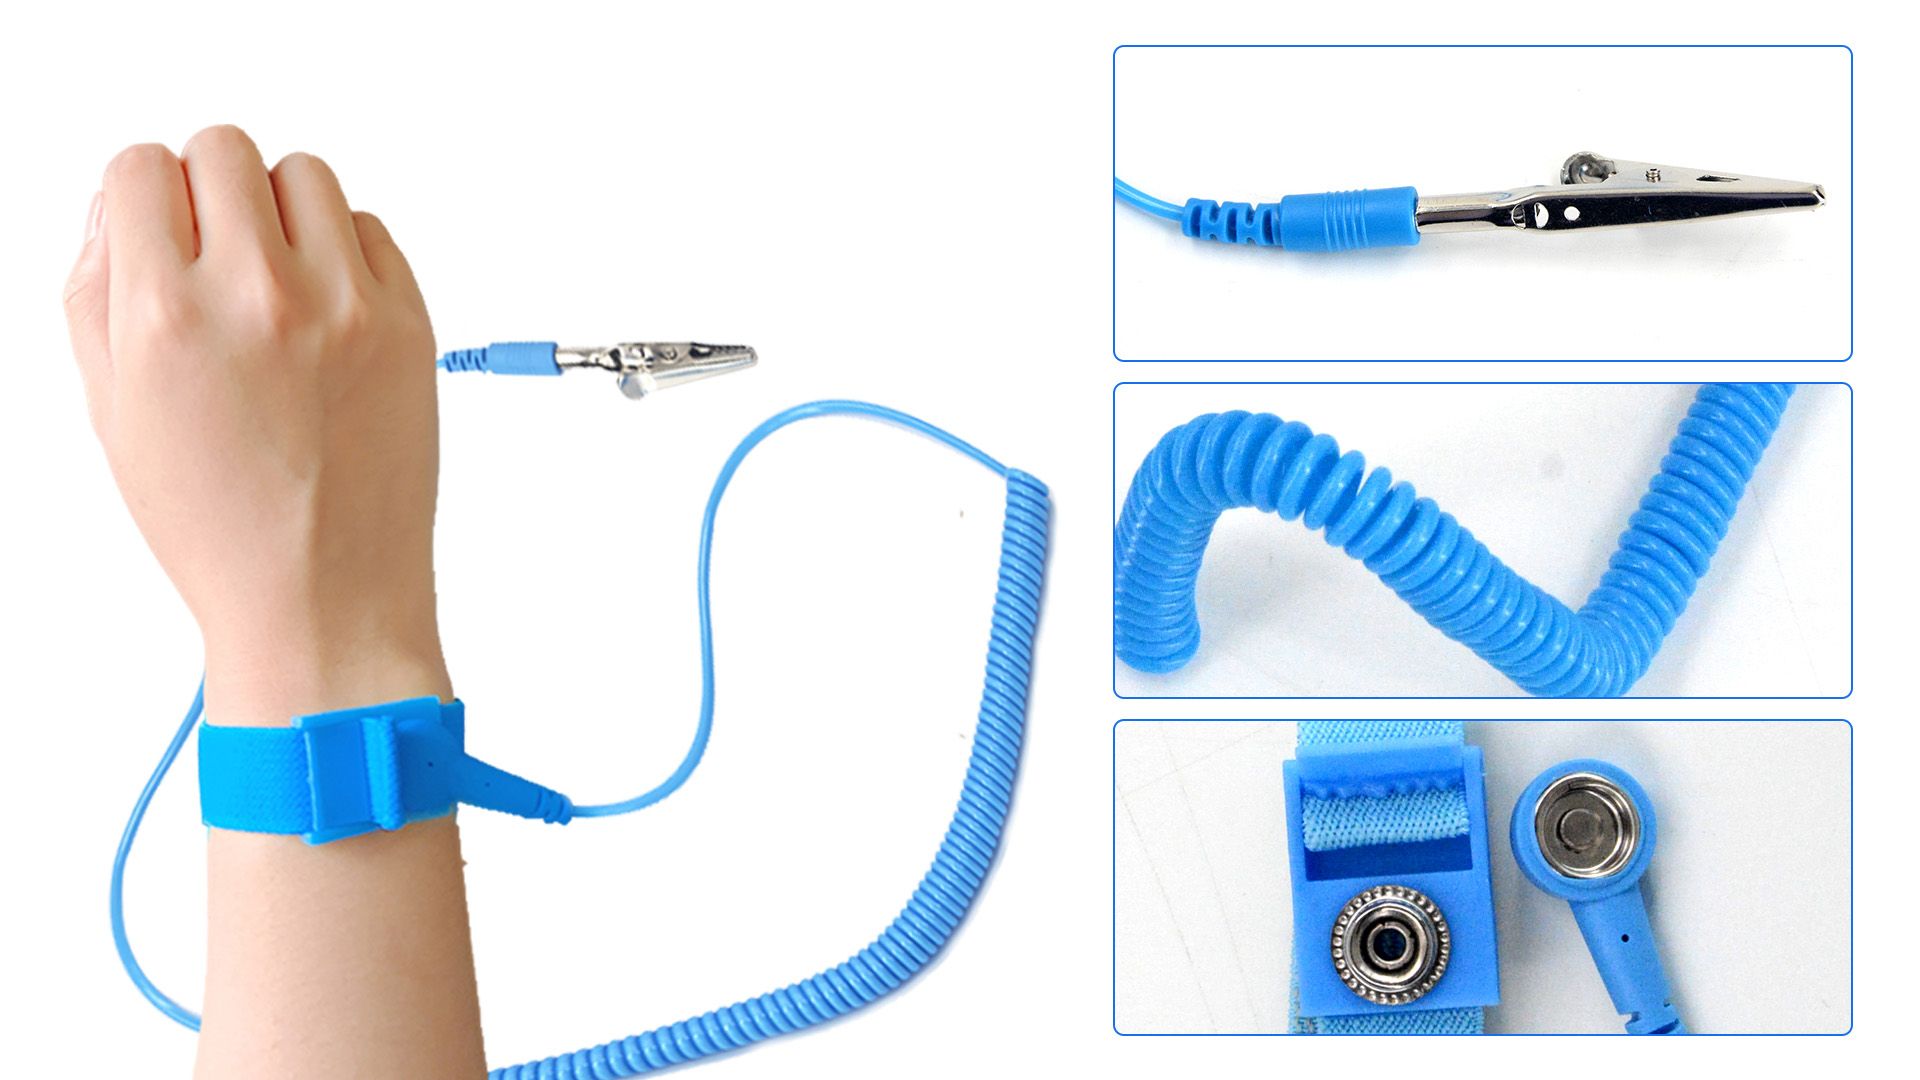
A proper ESD wrist strap system is a simple loop:
Band → snap → 1 MΩ resistor → cord → clip → ground.
The weakest points are:
The snap‑to‑cord joint
Every time you put on or take off the strap, this point flexes. After a few thousand cycles, the copper wire inside fatigues and breaks. The soft outer jacket hides the break – you cannot see it.The conductive yarn inside the band
Cheap bands use thin conductive yarn. Sweat, friction, and improper washing break the yarn. Band resistance climbs from a few kΩ to tens of MΩ. Now you are wearing a pretty bracelet, not an ESD strap.Clip contact to ground
Many operators clip to a table leg or machine frame covered with paint. Paint is an insulator. Even if you scrape off a bit of paint, the exposed metal oxidizes over time and stops conducting.
4. 30‑second self‑check: is your wrist strap really working?
If you do not have a dedicated wrist strap tester (combo tester), you can use a basic digital multimeter to check for open circuits.
| Test | Steps | Normal reading | Failure indication |
|---|---|---|---|
| Cord continuity | Multimeter in 200 Ω range. Measure from clip to snap metal. | <2 Ω | Open line (OL) → broken cord |
| Total resistance | Multimeter in 2 MΩ range. Same points (clip to snap). | 0.9–1.1 MΩ | <0.8 MΩ or >2 MΩ → bad resistor or open |
| Band conductivity | Remove band from cord. Touch probes to inner conductive surface, 1 cm apart. | <20 kΩ | >1 MΩ → conductive yarn failed |
5. What you can post at your test station (practical rules)
Test daily, not weekly
ANSI/ESD S20.20 requires daily testing. The cord can break during lunch. Yesterday’s pass does not guarantee today’s.Keep spare cords at each test station
A replacement cord costs a few dollars. Change it every 6–12 months or immediately when a test fails.Band must touch bare skin
Wearing the strap over a sleeve adds megohms of resistance – no static drain. Skin contact is not optional.Clip to bare metal
Paint, anodized coatings, and oxidized stainless steel are insulators. Scrape a clean spot or use a dedicated ground stud.Log real values, not check marks
If your tester shows a number, write it down. Trend data helps you catch aging cords before they fail completely.
6. Bottom line
An ESD wrist strap is your first and cheapest defense against static damage – but only if it is actually grounded, has the correct resistance, and is tested every day.
We have seen too many lines with perfect paper logs and 30% real failure rates. The problem is not the tester. The problem is not replacing the failed strap after a RED reading.
Use the checks above. Train your operators to treat a failed test as a stop‑work event. And keep a few spare cords nearby – they fail more often than you think.